# chat-gpt-front **Repository Path**: Learner_data/chat-gpt-front ## Basic Information - **Project Name**: chat-gpt-front - **Description**: 仿GPT前端项目 前端代码 - **Primary Language**: Unknown - **License**: MulanPSL-2.0 - **Default Branch**: master - **Homepage**: None - **GVP Project**: No ## Statistics - **Stars**: 10 - **Forks**: 1 - **Created**: 2023-09-04 - **Last Updated**: 2025-08-26 ## Categories & Tags **Categories**: Uncategorized **Tags**: None ## README # Vite + Vue3 + Typescript + Pinia + Vueuse # 环境依赖版本 - [node](https://github.com/nodejs/node):v14.15.4 - [vite](https://github.com/vitejs/vite):^2.8.0 - [vue](https://github.com/vuejs/vue):^3.2.25 - [typescript](https://github.com/microsoft/TypeScript):^4.5.4 - [pinia](https://github.com/vuejs/pinia):^2.0.12 - [vue-router](https://github.com/vuejs/router):^4.0.14 - [vueuse](https://github.com/vueuse/vueuse):^8.2.0 - [eslint](https://github.com/eslint/eslint):^8.12.0 - [prettier](https://github.com/prettier/prettier):^2.6.1 - [commitizen](https://github.com/commitizen/cz-cli):^4.2.4 - [husky](https://github.com/typicode/husky):^7.0.4 **长话短说,直接开干 ~** # 1. 初始化项目 ## 按步骤提示初始化: 1. 使用 vite-cli 命令 ```bash # pnpm pnpm create vite # npm npm init vite@latest # yarn yarn create vite ``` 2. 输入项目名: ```bash ? Project name: vite-vue3-ts-pinia ``` 3. 选择一个框架(vue) ```bash ? Select a framework: » - Use arrow-keys. Return to submit.     vanilla // 原生js  >   vue     // 默认就是 vue3     react   // react     preact // 轻量化react框架     lit     // 轻量级web组件     svelte // svelte框架 ``` 4. 使用 typescript ``` ? Select a variant: › - Use arrow-keys. Return to submit. vue ❯ vue-ts ``` 5. 启动项目 ```bash cd vite-vue3-ts-pinia && pnpm install && pnpm run dev ``` ## 快速初始化(建议使用): ``` # pnpm pnpm create vite project-name -- --template vue-ts # npm 6.x npm init vite@latest project-name --template vue-ts   # npm 7+, 需要额外的双横线: npm init vite@latest project-name -- --template vue-ts   # yarn yarn create vite project-name --template vue-ts ``` ## 集成配置 1. 为保证 node 的使用 ```bash pnpm i @types/node --save-dev ``` 2. 修改 `tsconfig.json` ```json { "compilerOptions": { "typeRoots": [ "node_modules/@types", // 默认值 "src/types" ], "target": "esnext", "useDefineForClassFields": true, "module": "esnext", "moduleResolution": "node", "strict": true, "jsx": "preserve", "sourceMap": true, "resolveJsonModule": true, "esModuleInterop": true, "lib": ["esnext", "dom"], "baseUrl": "./", "paths":{ "@": ["src"], "@/*": ["src/*"], } }, "include": ["src/**/*.ts", "src/**/*.d.ts", "src/**/*.tsx", "src/**/*.vue"] } ``` 3. 修改 `vite.config.ts` ```typescript import { defineConfig } from 'vite'; import vue from '@vitejs/plugin-vue'; import * as path from 'path'; // https://vitejs.dev/config/ export default defineConfig({ resolve: { //设置别名 alias: { '@': path.resolve(__dirname, 'src') } }, plugins: [vue()], server: { port: 8080, //启动端口 hmr: { host: '127.0.0.1', port: 8080 }, // 设置 https 代理 proxy: { '/api': { target: 'your https address', changeOrigin: true, rewrite: (path: string) => path.replace(/^\/api/, '') } } } }); ``` # 2. 代码质量风格的统一 ## 集成 `eslint` 1. 安装 ```bash pnpm i eslint eslint-plugin-vue --save-dev ``` 由于 ESLint 默认使用 [Espree](https://github.com/eslint/espree) 进行语法解析,无法识别 TypeScript 的一些语法,故我们需要安装 [`@typescript-eslint/parser`](https://github.com/typescript-eslint/typescript-eslint/tree/master/packages/parser) 替代掉默认的解析器 ```bash pnpm install @typescript-eslint/parser --save-dev ``` 安装对应的插件 [@typescript-eslint/eslint-plugin](https://github.com/typescript-eslint/typescript-eslint/tree/master/packages/eslint-plugin) 它作为 eslint 默认规则的补充,提供了一些额外的适用于 ts 语法的规则。 ```bash pnpm install @typescript-eslint/eslint-plugin --save-dev ``` 2. 创建配置文件: `.eslintrc.js` 或 `.eslintrc.json` ```javascript module.exports = { parser: 'vue-eslint-parser', parserOptions: { parser: '@typescript-eslint/parser', ecmaVersion: 2020, sourceType: 'module', ecmaFeatures: { jsx: true } }, extends: [ 'plugin:vue/vue3-recommended', 'plugin:@typescript-eslint/recommended', ], rules: { // override/add rules settings here, such as: } }; ``` 3. 创建忽略文件:`.eslintignore` ``` node_modules/ dist/ index.html ``` 4. 命令行式运行:修改 `package.json` ```json { ... "scripts": { ... "eslint:comment": "使用 ESLint 检查并自动修复 src 目录下所有扩展名为 .js 和 .vue 的文件", "eslint": "eslint --ext .js,.vue --ignore-path .gitignore --fix src", } ... } ``` ## 集成 `prettier` 1. 安装 ```bash pnpm i prettier eslint-config-prettier eslint-plugin-prettier --save-dev ``` 2. 创建配置文件: `prettier.config.js` 或 `.prettierrc.js` ``` javascript module.exports = { // 一行最多 80 字符 printWidth: 80, // 使用 4 个空格缩进 tabWidth: 4, // 不使用 tab 缩进,而使用空格 useTabs: false, // 行尾需要有分号 semi: true, // 使用单引号代替双引号 singleQuote: true, // 对象的 key 仅在必要时用引号 quoteProps: 'as-needed', // jsx 不使用单引号,而使用双引号 jsxSingleQuote: false, // 末尾使用逗号 trailingComma: 'all', // 大括号内的首尾需要空格 { foo: bar } bracketSpacing: true, // jsx 标签的反尖括号需要换行 jsxBracketSameLine: false, // 箭头函数,只有一个参数的时候,也需要括号 arrowParens: 'always', // 每个文件格式化的范围是文件的全部内容 rangeStart: 0, rangeEnd: Infinity, // 不需要写文件开头的 @prettier requirePragma: false, // 不需要自动在文件开头插入 @prettier insertPragma: false, // 使用默认的折行标准 proseWrap: 'preserve', // 根据显示样式决定 html 要不要折行 htmlWhitespaceSensitivity: 'css', // 换行符使用 lf endOfLine: 'auto' } ``` 3. 修改 `.eslintrc.js` 配置 ```javascript module.exports = { ... extends: [ 'plugin:vue/vue3-recommended', 'plugin:@typescript-eslint/recommended', 'prettier', 'plugin:prettier/recommended' ], ... }; ``` 4. 命令行式运行:修改 `package.json` ```json { ... "scripts": { ... "prettier:comment": "自动格式化当前目录下的所有文件", "prettier": "prettier --write" } ... } ``` # 3. 集成 `pinia` `Pinia` 读音:['piːnə],是 Vue 官方团队推荐代替`Vuex`的一款轻量级状态管理库。 **Pinia 有如下特点:** - 完整的 typescript 的支持; - 足够轻量,压缩后的体积只有1.6kb; - 去除 mutations,只有 state,getters,actions(这是我最喜欢的一个特点); - actions 支持同步和异步; - 没有模块嵌套,只有 store 的概念,store 之间可以自由使用,更好的代码分割; - 无需手动添加 store,store 一旦创建便会自动添加; ## 安装 ```  pnpm i pinia --save ``` ## 使用 1. 新建 src/store 目录并在其下面创建 index.ts,导出 store ``` typescript  import { createPinia } from 'pinia'  const store = createPinia()  export default store ``` 2. 在 main.ts 中引入并使用 ```typescript  import { createApp } from 'vue'  import App from './App.vue'  import store from './store'  ​  // 创建vue实例  const app = createApp(App)  ​  // 挂载pinia  app.use(store)  ​  // 挂载实例  app.mount('#app'); ``` 3. **定义State:** 在 src/store 下面创建一个 user.ts ```typescript  import { defineStore } from 'pinia'  export const useUserStore = defineStore({    id: 'user', // id必填,且需要唯一    state: () => {      return {        name: '张三'     }   },    actions: {      updateName(name) {        this.name = name     }   }  }) ``` 4. **获取State:** 在 src/components/usePinia.vue 中使用 ```typescript     ``` 5. **修改State:** ```typescript  // 1. 直接修改 state (不建议)  userStore.name = '李四'  // 2. 通过 actions 去修改   ``` > 更详细上手指南:[链接](https://juejin.cn/post/7049196967770980389) 官方文档:[链接](https://pinia.vuejs.org/introduction.html) # 4. 集成 `vue-router4` ## 安装 ```bash  pnpm i vue-router --save ``` ## 使用 1. 新建 src/router 目录并在其下面创建 index.ts,导出 router ```typescript  import { createRouter, createWebHistory, RouteRecordRaw } from 'vue-router';  const routes: Array = [   {      path: '/login',      name: 'Login',      meta: {          title: '登录',          keepAlive: true,          requireAuth: false     },      component: () => import('@/pages/login.vue')   },   {        path: '/',        name: 'Index',        meta: {            title: '首页',            keepAlive: true,            requireAuth: true       },        component: () => import('@/pages/index.vue')   }  ]  const router = createRouter({    history: createWebHistory(),    routes  });  export default router; ``` 2. 在 main.ts 中引入并使用 ```typescript  import { createApp } from 'vue'  import App from './App.vue'  import store from './store'  import router from '@/router';  // 创建vue实例  const app = createApp(App);  app.use(router);  // 挂载实例  app.mount('#app'); ``` 3. 修改 App.vue ```typescript   ``` # 5. 集成 `vueuse` `VueUse` 是一个基于 `Composition API` 的实用函数集合。 ## 安装 ```  pnpm i @vueuse/core ``` ## 使用 1. 创建一个新的 src/page/vueUse.vue 页面来做一个简单的 demo ```typescript     ``` useMouse 只是 vueuse 的一个最基本的函数库,还有许多,总会有一个适合你; 更多函数官方文档:[链接](https://vueuse.org/) # 6. CSS 的集成 ## 方案一:原生 css variable 新特性: 原生支持,不需要第三方插件,具体使用文档可 [查看](https://developer.mozilla.org/zh-CN/docs/Web/CSS/var) 1. 新建文件 src/styles/index.css ```css  :root {    --main-bg-color: pink;  }  ​  body {    background-color: var(--main-bg-color);  } ``` 注:还可以增加 PostCSS 配置,(任何受 [postcss-load-config](https://github.com/postcss/postcss-load-config) 支持的格式,例如 `postcss.config.js` ),它将会自动应用于所有已导入的 CSS。 ## 方案二:scss 或 less: 1. 安装 ```bash  # .scss and .sass  pnpm add -D sass  # .less  pnpm add -D less ``` 2. 使用在 .vue 文件模板中 ```typescript // .scss     // .less     ``` # 7. 集成 `axios` `axios` 是一个基于 promise 的 HTTP 库,可以用在浏览器和 node.js 中。 ## 安装 ```bash  pnpm i axios ``` ## 使用: 1. 新建 src/utils/axios.ts ```typescript  import axios, { AxiosResponse, AxiosRequestConfig } from 'axios';  const service = axios.create();  // Request interceptors  service.interceptors.request.use(     (config: AxiosRequestConfig) => {          // do something          return config;     },     (error: any) => {          Promise.reject(error);     }  );  // Response interceptors  service.interceptors.response.use(      async (response: AxiosResponse) => {          // do something     },     (error: any) => {          // do something          return Promise.reject(error);     }  );  export default service; ``` 2. 在页面中使用即可 ```typescript ``` ## 封装请求参数和响应数据的所有 api (可选项) 1. 新建 `src/api/index.ts` ```typescript import * as login from './module/login'; import * as index from './module/index'; export default Object.assign({}, login, index); ``` 2. 新建 `src/api/module/login.ts` 和 `src/api/module/index.ts` ```typescript import request from '@/utils/axios'; /** * 登录 */ interface IResponseType

{ code?: number; status: number; msg: string; data: P; } interface ILogin { token: string; expires: number; } export const login = (username: string, password: string) => { return request>({ url: '/api/auth/login', method: 'post', data: { username, password } }); }; ``` 3. 由于使用了 typescript,所以需新增 `src/types/shims-axios.d.ts` ```typescript import { AxiosRequestConfig } from 'axios'; /** * 自定义扩展axios模块 * @author Maybe */ declare module 'axios' { export interface AxiosInstance { (config: AxiosRequestConfig): Promise; request(config: AxiosRequestConfig): Promise; get(url: string, config?: AxiosRequestConfig): Promise; delete(url: string, config?: AxiosRequestConfig): Promise; head(url: string, config?: AxiosRequestConfig): Promise; post(url: string, data?: any, config?: AxiosRequestConfig): Promise; put(url: string, data?: any, config?: AxiosRequestConfig): Promise; patch(url: string, data?: any, config?: AxiosRequestConfig): Promise; } } ``` 4. 在 `src/pages/request.vue` 页面中使用 ```typescript ``` # 8. css 的 UI 样式库 > 可选很多,根据自己项目的需求去进行选择即可 **注意:UI 库一般需要按需引入(下面以 `element-plus` 为例)** 1. 安装 `vite-plugin-style-import` ```bash pnpm i vite-plugin-style-import --save-dev ``` 2. 修改 `vite.config.ts` ```typescript ... import styleImport from 'vite-plugin-style-import' export default defineConfig({ ... plugins: [ vue(), styleImport({ libs: [ { libraryName: 'element-plus', esModule: true, resolveStyle: (name) => { return `element-plus/lib/theme-chalk/${name}.css`; }, ensureStyleFile: true // 忽略文件是否存在, 导入不存在的CSS文件时防止错误。 } ] }) ], ... }) ``` # 9. 使用 [commitizen](https://github.com/commitizen/cz-cli) 规范git提交 为了使团队多人协作更加的规范,所以需要每次在 git 提交的时候,做一次硬性规范提交,规范 git 的提交信息 ## 安装 `commitizen` (交互式提交 + 自定义提示文案 + Commit规范) 1. 安装 ```bash pnpm install -D commitizen cz-conventional-changelog @commitlint/config-conventional @commitlint/cli commitlint-config-cz cz-customizable ``` 2. 配置 `package.json` ```json { ... "scripts": { "commit:comment": "引导设置规范化的提交信息", "commit":"git-cz", }, "config": { "commitizen": { "path": "node_modules/cz-customizable" } }, ... } ``` 3. 新增配置 `commitlint.config.js` ```javascript module.exports = { extends: ['@commitlint/config-conventional', 'cz'], rules: { 'type-enum': [ 2, 'always', [ 'feature', // 新功能(feature) 'bug', // 此项特别针对bug号,用于向测试反馈bug列表的bug修改情况 'fix', // 修补bug 'ui', // 更新 ui 'docs', // 文档(documentation) 'style', // 格式(不影响代码运行的变动) 'perf', // 性能优化 'release', // 发布 'deploy', // 部署 'refactor', // 重构(即不是新增功能,也不是修改bug的代码变动) 'test', // 增加测试 'chore', // 构建过程或辅助工具的变动 'revert', // feat(pencil): add ‘graphiteWidth’ option (撤销之前的commit) 'merge', // 合并分支, 例如: merge(前端页面): feature-xxxx修改线程地址 'build', // 打包 ], ], // 格式 小写 'type-case': [2, 'always', 'lower-case'], // 不能为空 'type-empty': [2, 'never'], // 范围不能为空 'scope-empty': [2, 'never'], // 范围格式 'scope-case': [0], // 主要 message 不能为空 'subject-empty': [2, 'never'], // 以什么为结束标志,禁用 'subject-full-stop': [0, 'never'], // 格式,禁用 'subject-case': [0, 'never'], // 以空行开头 'body-leading-blank': [1, 'always'], 'header-max-length': [0, 'always', 72], }, }; ``` 4. 自定义提示则添加 `.cz-config.js` ```javascript module.exports = { types: [ {value: 'feature', name: 'feature: 增加新功能'}, {value: 'bug', name: 'bug: 测试反馈bug列表中的bug号'}, {value: 'fix', name: 'fix: 修复bug'}, {value: 'ui', name: 'ui: 更新UI'}, {value: 'docs', name: 'docs: 文档变更'}, {value: 'style', name: 'style: 代码格式(不影响代码运行的变动)'}, {value: 'perf', name: 'perf: 性能优化'}, {value: 'refactor', name: 'refactor: 重构(既不是增加feature,也不是修复bug)'}, {value: 'release', name: 'release: 发布'}, {value: 'deploy', name: 'deploy: 部署'}, {value: 'test', name: 'test: 增加测试'}, {value: 'chore', name: 'chore: 构建过程或辅助工具的变动(更改配置文件)'}, {value: 'revert', name: 'revert: 回退'}, {value: 'build', name: 'build: 打包'} ], // override the messages, defaults are as follows messages: { type: '请选择提交类型:', customScope: '请输入您修改的范围(可选):', subject: '请简要描述提交 message (必填):', body: '请输入详细描述(可选,待优化去除,跳过即可):', footer: '请输入要关闭的issue(待优化去除,跳过即可):', confirmCommit: '确认使用以上信息提交?(y/n/e/h)' }, allowCustomScopes: true, skipQuestions: ['body', 'footer'], subjectLimit: 72 }; ``` 5. 交互界面测试 ![carbon.png](https://p9-juejin.byteimg.com/tos-cn-i-k3u1fbpfcp/d2be96b13d3c427e919b11e5bc5404e4~tplv-k3u1fbpfcp-watermark.image?) - 
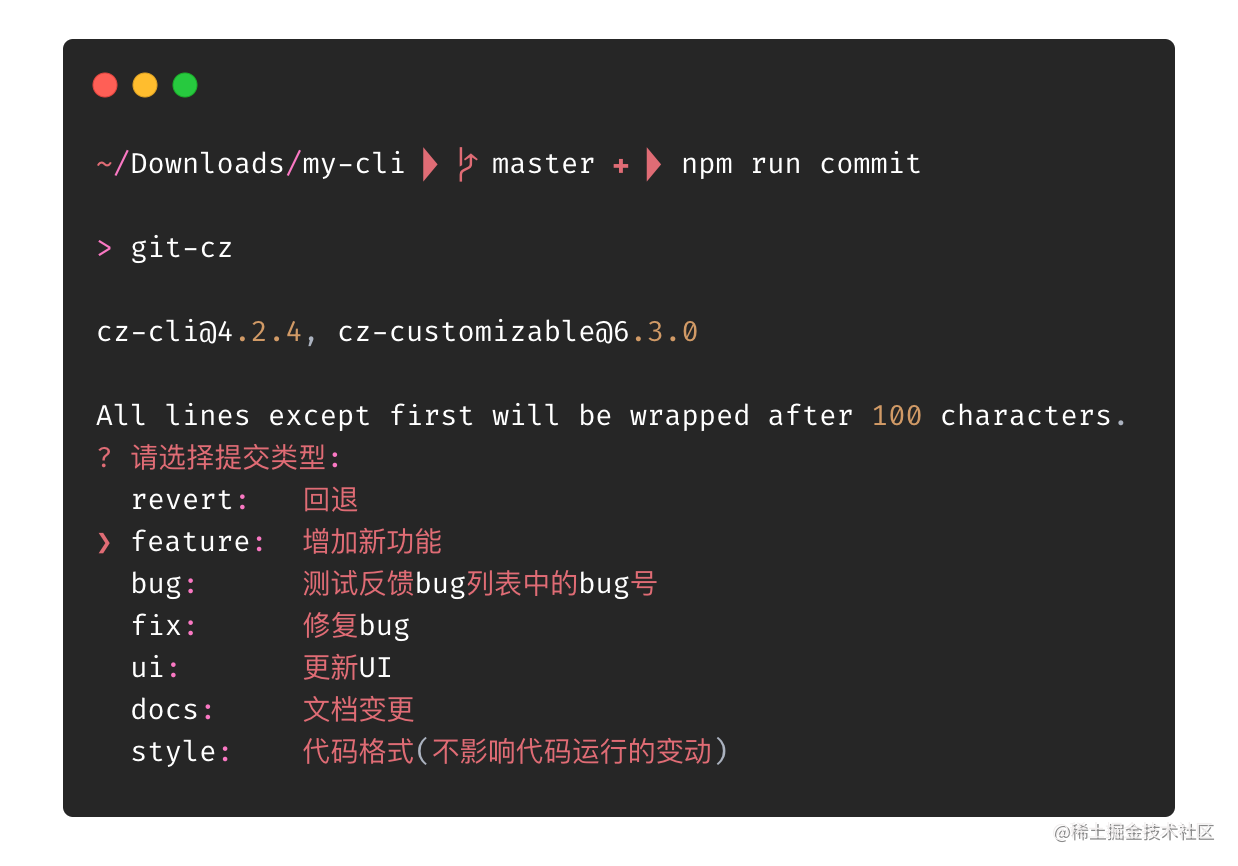
到目前只是规范了 git 的提交信息,我们对提交前代码的检查还没有做到位,例如 ESLint、Prettier,毕竟谁都会有疏忽的时候, - 那么现在我们的 husky 就闪亮登场了 ## 安装 husky 1. 安装 ```bash # 1.安装 pnpm i husky lint-staged -D # 2.生成 .husky 的文件夹 npx husky install # 3.添加 hooks,会在 .husky 目录下生成一个 pre-commit 脚本文件 npx husky add .husky/pre-commit "npx --no-install lint-staged" # 4.添加 commit-msg npx husky add .husky/commit-msg 'npx --no-install commitlint --edit "$1"' # 5. 使用 `git commit -m "message"` 就会看到 hook 生效了。 ``` 2. 添加配置 `package.json` ```json { ... "lint-staged": { "*.{js,ts}": [ "npm run eslint", "npm run prettier" ] } ... } ``` ## 提交日志(可选) - [standard-version](https://github.com/conventional-changelog/standard-version) 或者 [conventional-changelog](https://github.com/conventional-changelog/conventional-changelog) `靓仔靓女们`,都看到这里了,要不点个赞再走呗 🌹🌹🌹